If you have a Windows 7 computers on different subnets, as I do, you may want to enable sharing files between them and this involves enabling file sharing across different subnets.
The setup I will use as an example is pretty simplistic:
Assume that you have a router with an ethernet-based LAN which is configured as subnet 192.168.77.xx, and a Wifi-based network interface that uses the subnet 192.168.99.xx. Lets now consider that you connect a Windows 7 computer via ethernet on your LAN and a Windows 7 laptop connects to your Wifi. Attempting to see filesystem shares between these two computers will most likely fail. This is because of the default firewall rules of Windows 7. To ensure the problem is related to the Windows 7 firewall rules, just disable it on both computers and try to connect to each other. If this is successful, enable the firewall again and follow the instructions next. If you still cannot connect then the following is not going to help you and you should investigate your network configuration, connectivity, etc.
First figure out what type of network is the one you are connected to. You can find out by looking in: Control Panel > Network and Internet > Network and Sharing Center.
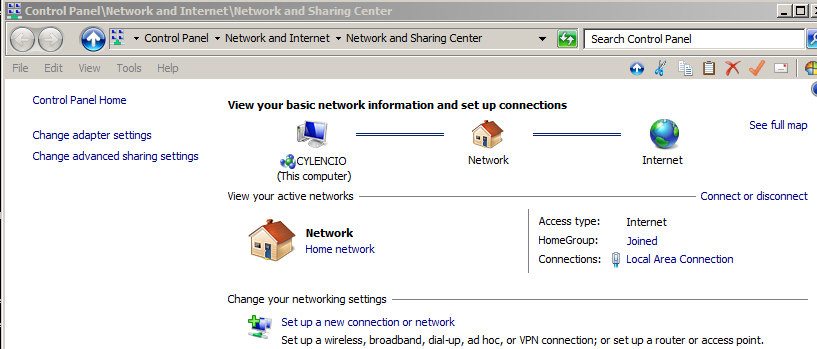
Network and Sharing Center showing a “Home network” configuration.
Look for “View your active networks”, it will have either of the following:
- “Home network”, which means the network you are connecting to is Private in your firewall rules,
- “Work network”, which means the network you are connecting to is Domain in your firewall rules,
- “Public network”, which means the network you are connecting to is Public in your firewall rules.
Next, open your Control Panel > System and Security > Windows Firewall > Advanced Settings and select the Inbound Rules. Then scroll down to “File and Printer Sharing (SMB-In)” and choose the profile that your network is in (Private, Public, Domain). Double-click (or right-click > Properties) to modify it. The window shown below will appear.
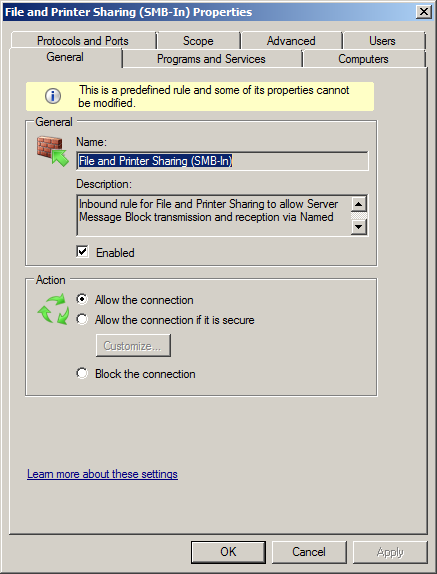
File and Printer Sharing Inbound Rules window.
Switch to the “Scope” tab and look at the lower part of the tab, “Remote IP address”. Instead of the default “Any IP address”, choose “These IP addresses:” and press the button Add. Then under “This IP address or subnet” type in the first subnet: 192.168.77.0/24 and press OK, to add the one subnet. Repeat the process to add the second subnet 192.168.99.0/24.
The Scope tab of your Inbound Rule will look similar to the following Figure.
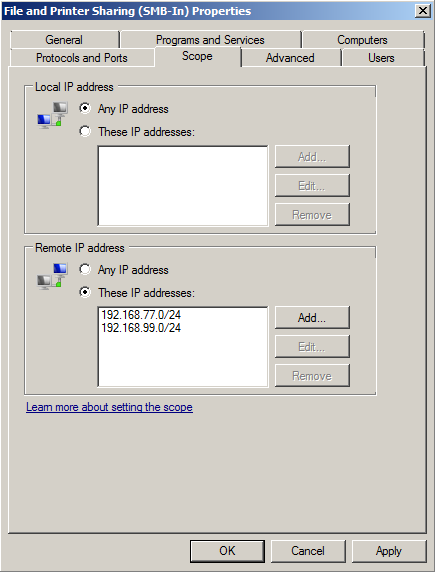
File and Printer Sharing (SMB-In) allowing two subnets
If you want to enable sharing over any network use the “Any IP address” option instead of inserting specific subnets. However, you should consider the implications of this since anyone will be able to see the sharing and potentially access it (depending on the permissions you set for it).